Thursday, August 15, 2013

"Art is Life" DIY Pendant Tutorial


Directions to make this wonderful pendant are below.......


1. You will need Stampendous Frantage Mica pieces.
 2. You will also need Judikins Diamond Glaze.
 3. Start with a pendant tray blank. Apply a coat of the glaze to cover entire bottom. This is what the mica flakes will adhere to.
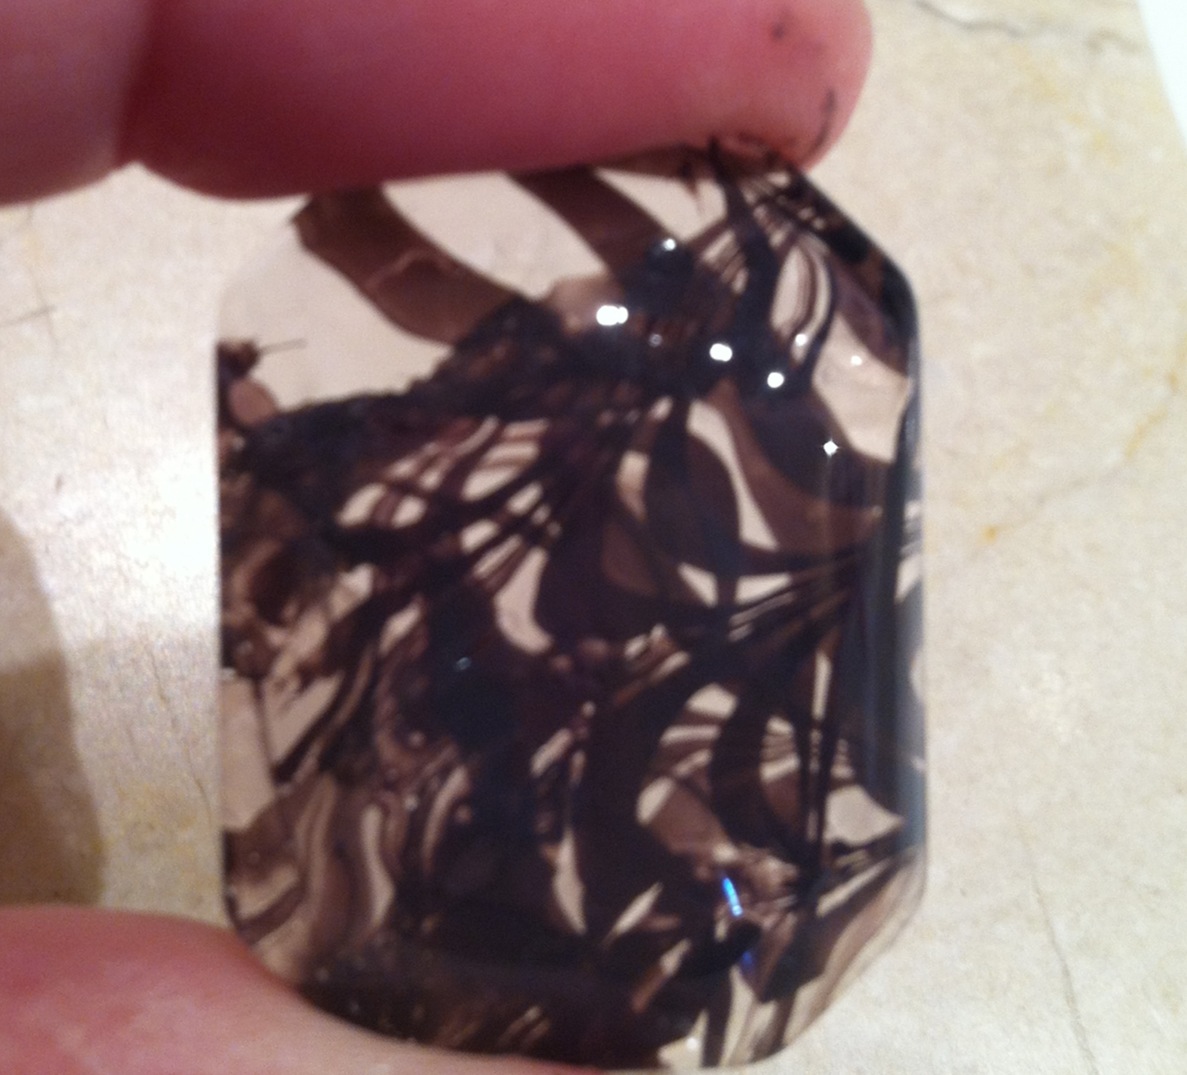
 4. Add the mica flakes to cover the entire bottom of the pendant tray. Press gently so they attatch to the glaze.
5. Apply a coat of glaze to the back of your wording and place on top of the pieces. Press down gently. Let dry.
 6. If you'd like, you can add a few drops of glaze and more mica flakes to any emptier spots. Using a toothpick or pushpin helps. You will then apply another full coat of glaze. You can add a few pieces on top of the wet glaze as well. They will sink in and blend.
7. Allow to dry, add to a necklace strand, and you are done!
 
You can find pendant trays, Judikins Diamond Glaze, and necklace strands in our stores!


Monday, August 12, 2013

16mm Square Pendant Tray

This is an example of the crackle nail polish method on our 16mm square glass cabochon used in our 16mm square pendant tray. Colors turned out great! You can find the pendant tray, glass cabochon, E6000 adhesive, and ball chain strand in our shops!
Www.willowruncrafts.com  Or   Www.etsy.com/shop/karenscraftsupplies


Sunday, August 11, 2013

Swirl Design Necklace with a Pendant Tray


Swirl Design Necklace Tutorial- using a Pendant Tray


This is quite a fun pendant to make! First, start with a cup full of water. Using a clear nail polish and a very dark (we used dark gray) nailpolish, start to make drops into the cup. It doesn't really matter which color you start with. Let a single drop go into the water. You will see it start to spread out. Now drop a drop of the other color (whichever you did not just use). Drop it right into the middle. You will see it actually push the first color out, as if forming a ring. Keep alternating colors in this fashion until the cup is full of rings.


 Next, you will take either a long pushpin or toothpick. Poke it into the center, and drag out to the edge of the cup. You will see designs being formed. Continue doing this all around the circle.


Once that is complete, take your glass, flat side facing up, dip into the edge of the cup and swoop us. As you do this, you will see the designs placing themselves into the flat side of the glass. Once you have the nailpolish designs on as you like them, take the glass out carefully. Your fingers will be messy, so you may want to clean your finger with nailpolish remover. Also, using a Q-tip, clean off the front of the glass (not the flat decorated side!). This will make it look more complete. 


Once the polish for the design has dried, use any colors of nailpolish you would like and paint over the dark designs (on the flat side). You can use one color or many colors! Whatever you prefer. Once painted, let dry. We repeated the same process a couple times to make the color stronger. Once those layers of color dry, add a coat or two of white nail polish.


Once all polish has dried, add a small amount of E6000 to the flat side of the glass, and place into your pendant tray. You are complete!!!!


You can find pendant trays, glass cabochons or glass tiles, E6000, and necklace strands at our shops:


Tuesday, August 6, 2013

Upside down Sticker Pendant


Below are the step by step directions to make a pendant necklace like this!


1. Apply one coat clear polish to flat side of glass cabochon. 
2. Have stickers ready (these are nail stickers), and in position you desire. Use pins to place non-sticky side down on flat glass. 
3. Once on polish, gently use pins to smooth sticker completely down. Gently apply another coat of polish over entire flat area. 
4. Once dry, apply any additional colors you like. Have fun with it!
5. After those dry, you can add a final coat of a darker color if you want to make any light colors show up better. 
6. Once all polish is dry, apply a little E6000 and attach glass to pendant. Add it to a necklace, perhaps add a charm, you are done!
 
You can find all the jewelry supplies (minus stickers and polish) at www.willowruncrafts.com
Or www.etsy.com/shop/karenscraftsupplies 


Monday, August 5, 2013

"Dream" necklace tutorial


This is a rather easy visual tutorial to make this pendant necklace.
1. Start with a pendant tray blank.
2. Put a couple coats of nailpolish inside the pendant tray.
3. Have your stickers ready (pre-plan the positions). The flatter the stickers, the better.
4. Carefully place the stickers on the wet polish.
5. Let dry.
6. Add your glass cabochon/ glass tile to pendant tray using crystal lacquer. Once dry, add the pendant to a necklace strand, and you are done!